Attic Doors
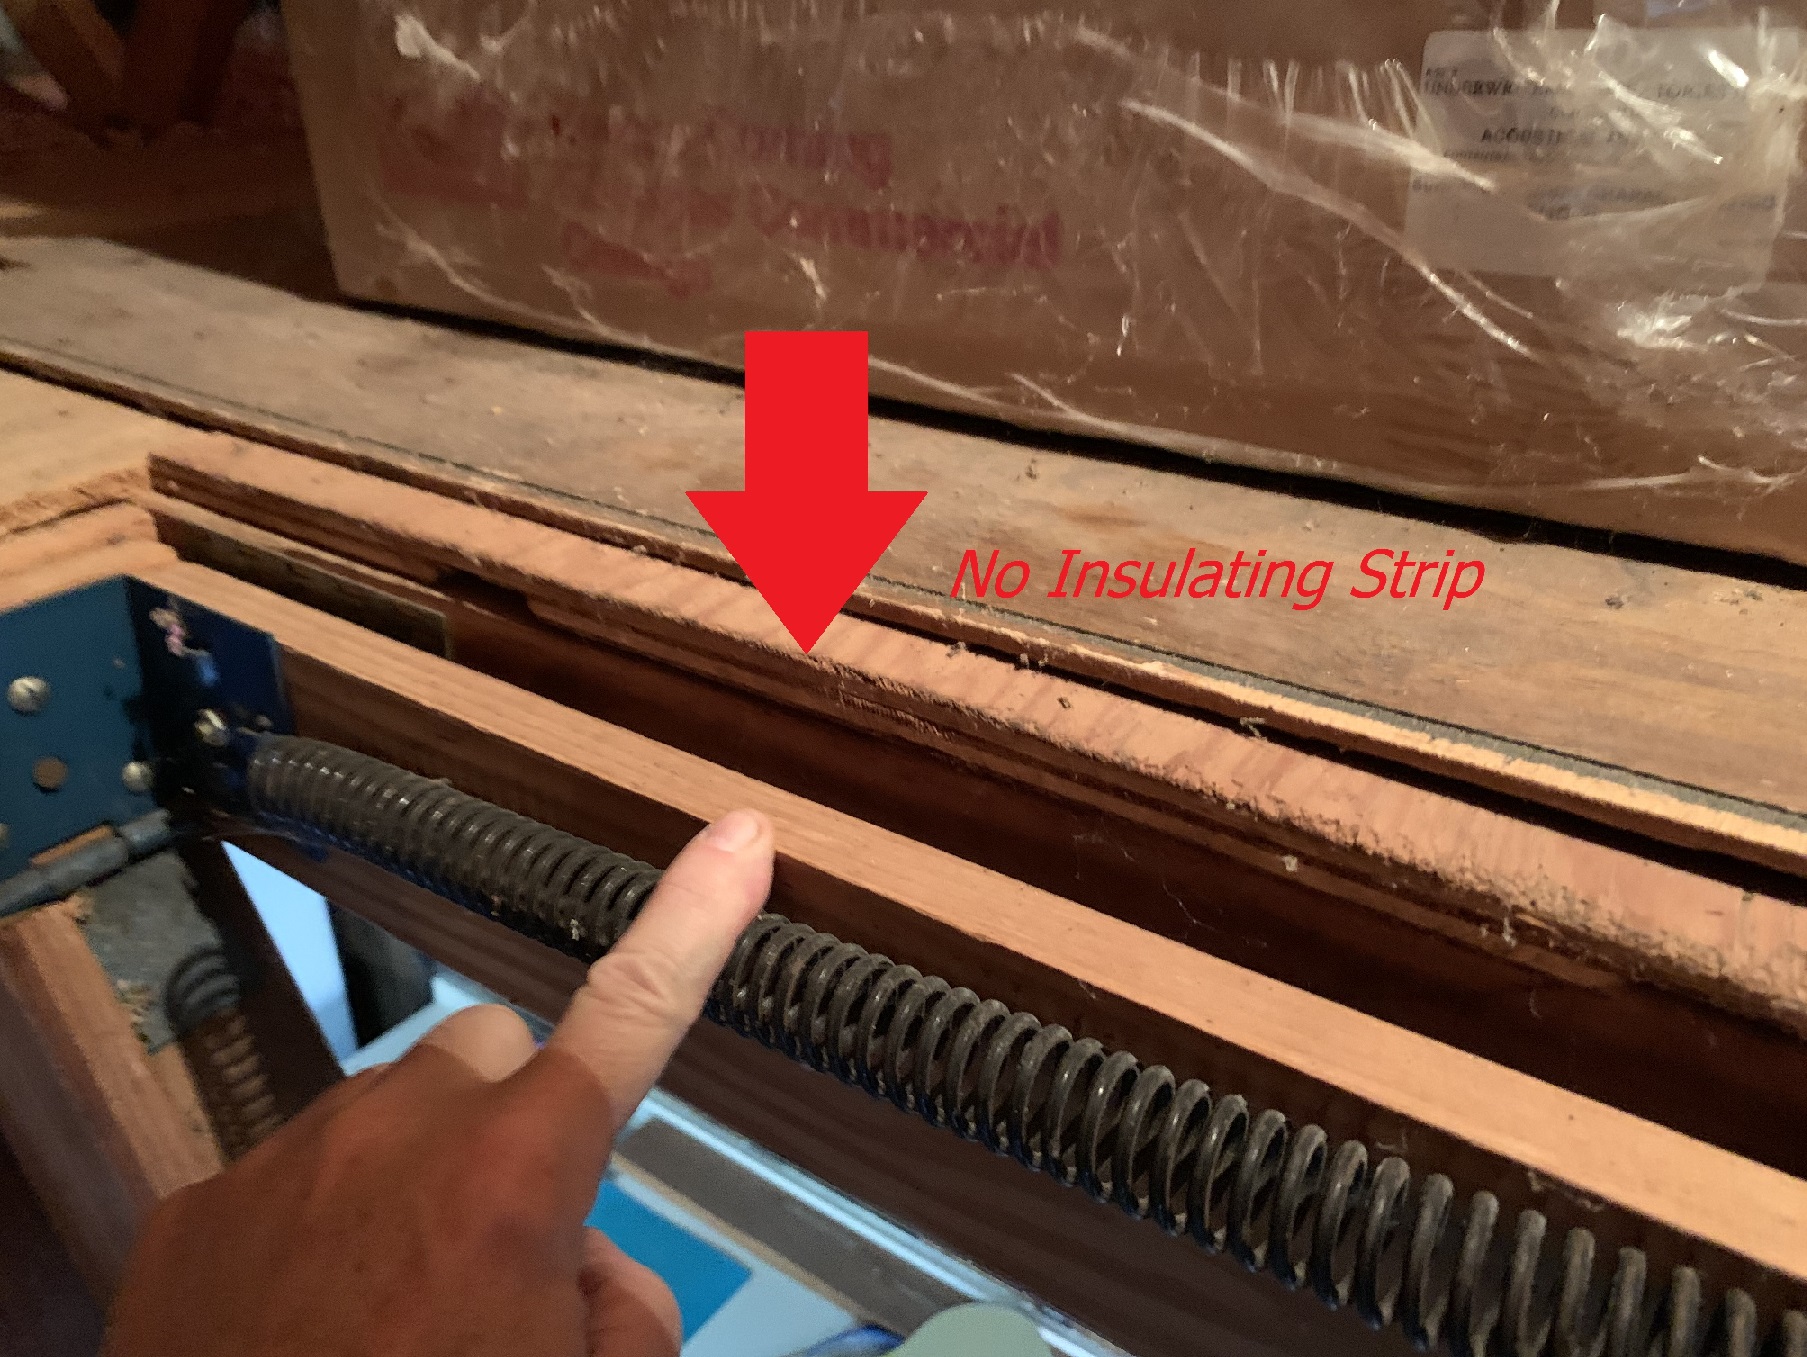
Recently I inspected a property here in Coffee County, TN with a newly installed attic hatch. At Middle Tennessee Inspections we always take a lot of InfraRed (IR) pictures and I’m glad I did here. The attic was insulated, but the door was not. It lacked a ‘weatherstrip

Attic Door using IR Camera
ping seal’ to close up the gap between the door and the frame. A quick trip to Lowes or Home Depot might save a lot of money for the homeowner.
Attic hatches have a hidden issue in that they may look to be in good working order but actually still leak a lot of energy. Even if the woodwork and paint on an attic hatch are immaculate, it can still be a gigantic heat leak. Although your attic is probably insulated, there’s a strong possibility your entrance hatch isn’t. In the Summer, it will radiate heat into the home, and in the Winter, it will release heat and let warm air out. Despite the fact that attic hatches can be the source of massive air leaks and radiant heat loss, they are rarely repaired.
Here are two suggestions for saving energy and you some money. Increase the thickness of the insulation on and around the door itself. Then, and this is frequently the most important step, close the space between the door and the hatch to prevent air flow and heat loss. For this example, we’ll utilize a standard plywood hatch with finish molding over the rough-cut hole.
Fiberglass insulation on the top of the door will help, but a better long-term option is to construct a box out of solid insulation that fits over the framed opening of the door, as well as any folded steps if you have them. Rigid insulation is more effective than fiberglass in terms of sealing the box. Plus, when you open the hatch, none of that fiberglass will fall into your house. There are commercially available alternatives. For attic stair insulation, your local hardware store has everything from ready-made reflective foil tents to complex covers manufactured from thick expanded polystyrene (EPS). You can also readily purchase pre-cut kits at hardware stores or on-line. They come in a number of sizes to fit a variety of attic door styles. Over time, that initial investment will save you a lot of money.
The weather-stripping on the hatches is frequently missing or insufficient. Even if it was fitted, there’s a good chance it’s been damaged as a result of use over time. When they dry out, they lose their effectiveness as well. Examine the weatherstripping and gaskets surrounding your attic hatch’s opening. If they appear to be damaged or dried out you should consider replacing them. It’s possible that they’ll simply rip away from the frame but if the weatherstripping was fastened with nails or screws, simply pull them out with a screwdriver or plyers. A wire cutter works to remove all of the fasteners as well. Two inch wood stays should be installed all the way around the opening if the attic hatch sits directly on the molding. These stops allow you to apply fresh weatherstripping with more ease. Hook and loop fasteners are a great idea to secure your door and hold it close to the weatherstripping.
After removing the old weatherstripping, or if there was none to begin with, you’re ready to install new weatherstripping. Cut it to fit snuggly on all four sides along the bottom edge of the trim as well as the other three edges. It’s much easier to use self-adhesive weatherstripping. When finished, completely close the door/hatch and press down on the gasket to create a complete seal.
Let the engineers and inspectors at Middle Tennessee Inspections assist you in minimizing your heating bills. We have the experience, knowledge, and equipment necessary to quickly diagnose problems and save you money.
Check out this great article for more information and some tips – https://ygrene.com/blog/property-improvements/7-ways-make-your-attic-more-energy-efficient

Attic Door Frame with no Weatherstripping


Leave a Reply
Want to join the discussion?Feel free to contribute!